

Everyone talks about how weakness of the glutes and core are the cause of low back pain but that isn’t always the case (and more often than not, it isn’t the reason). Sure, it may be a part of the problem, however there are a few other areas I tend to assess first to get to the root cause of low back pain.
Over the next few blogs I’ll be drawing your attention to 3 often forgotten areas that should almost always be assessed when it comes to pain in the lower back.
Let’s start at the bottom of the body – the ankle – and discuss how a lack of mobility here is often the hidden culprit behind low back pain. Before we dive into why, I want you to ask yourself these questions…
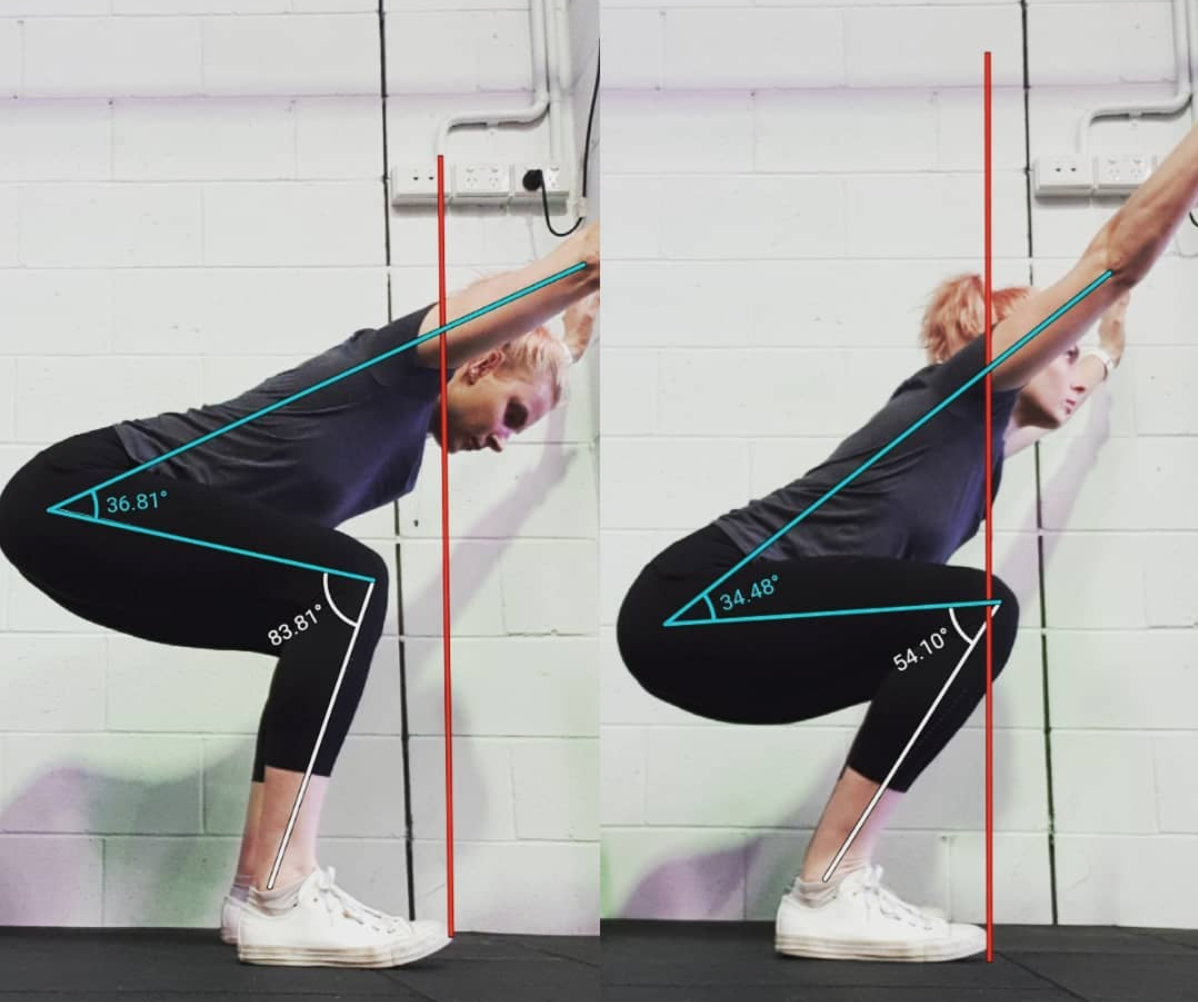
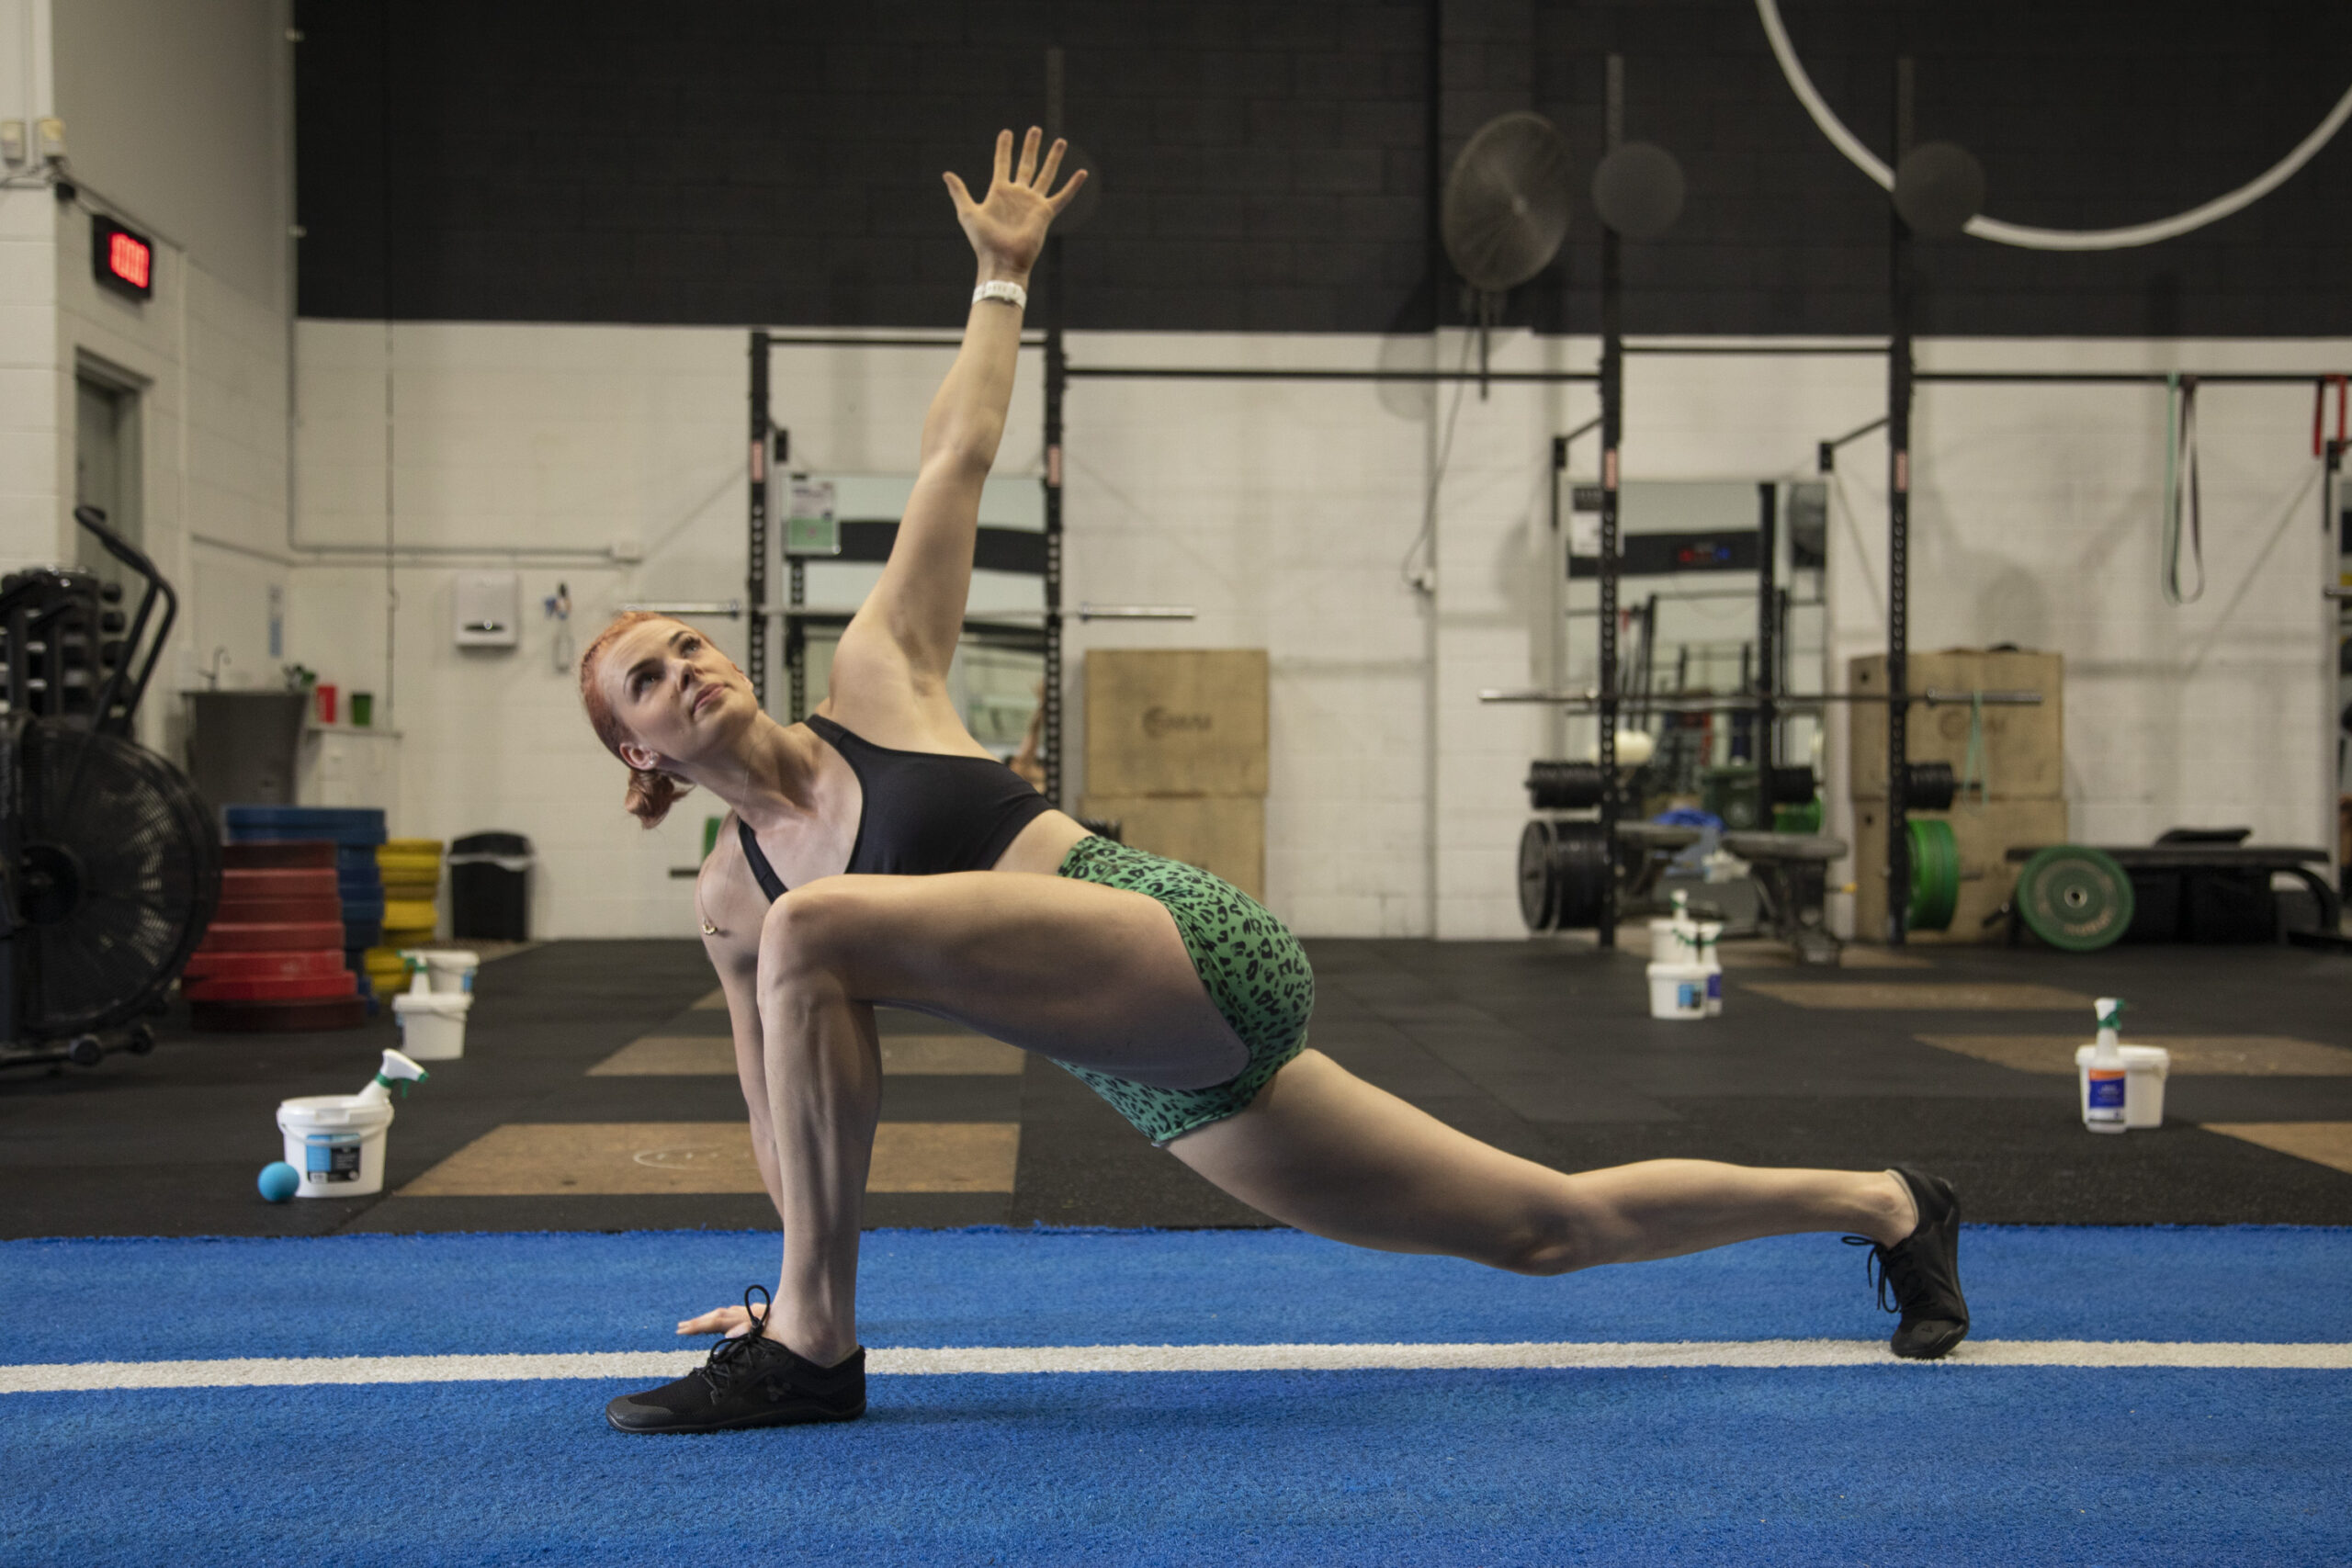
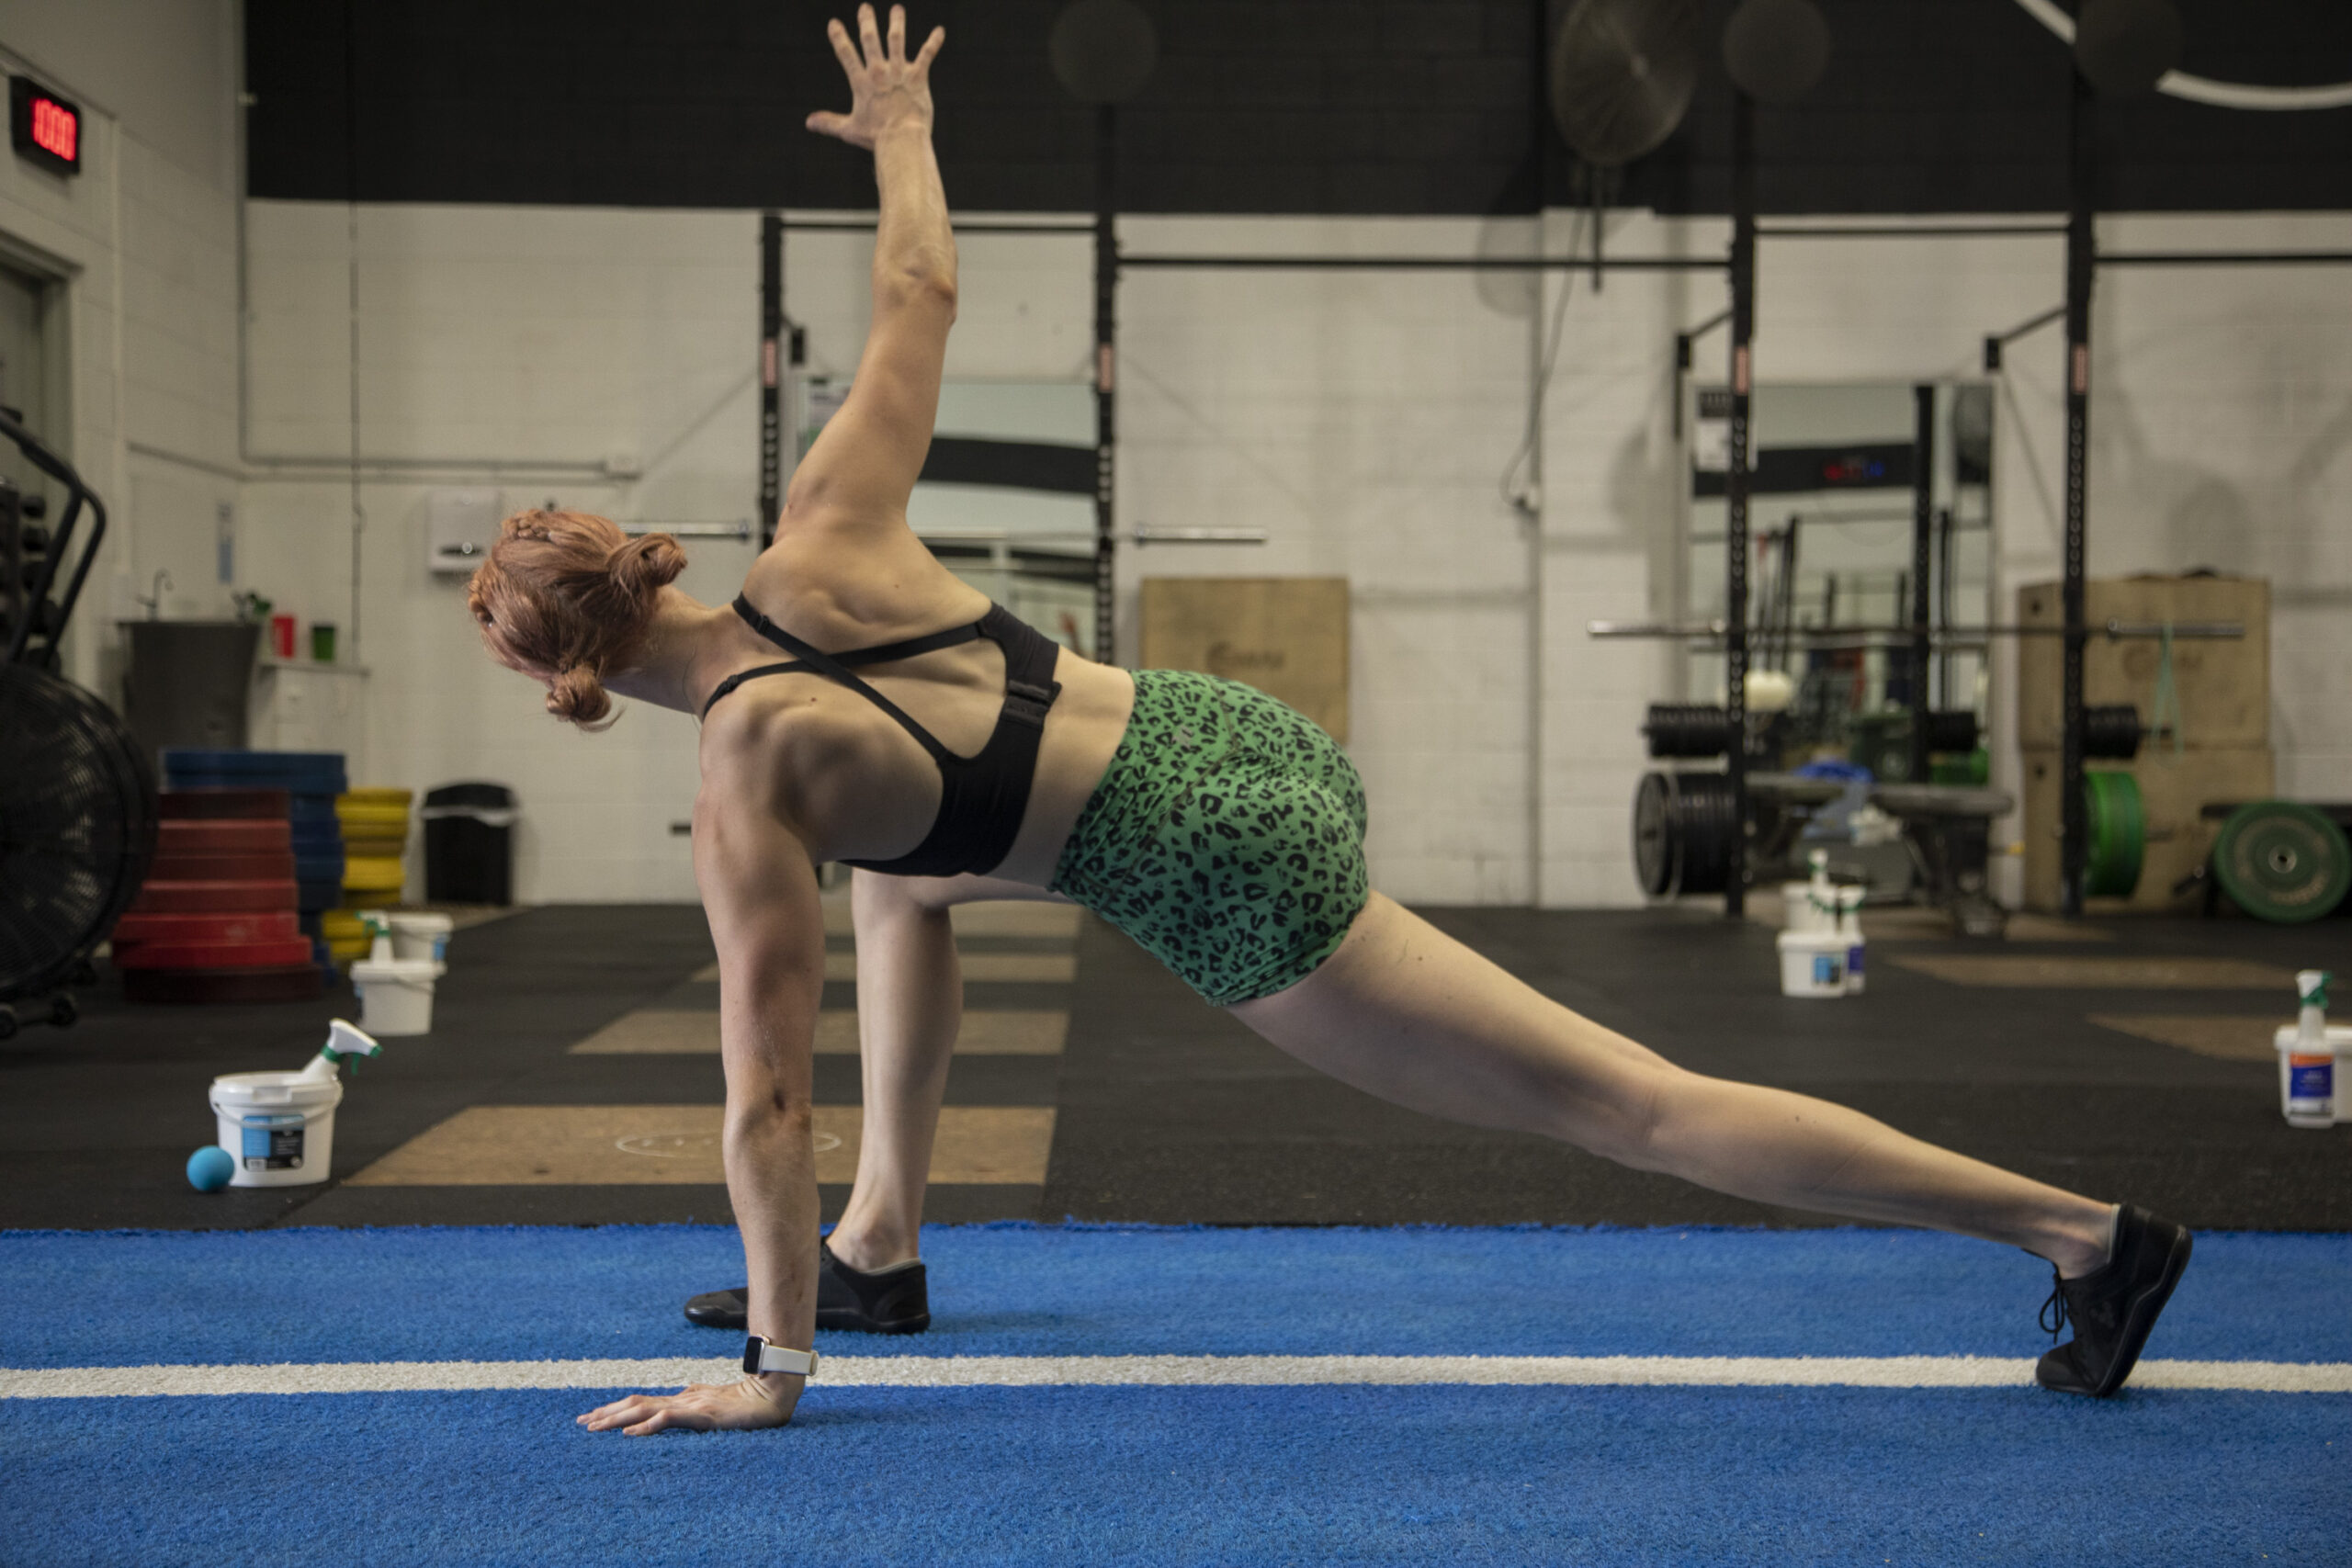
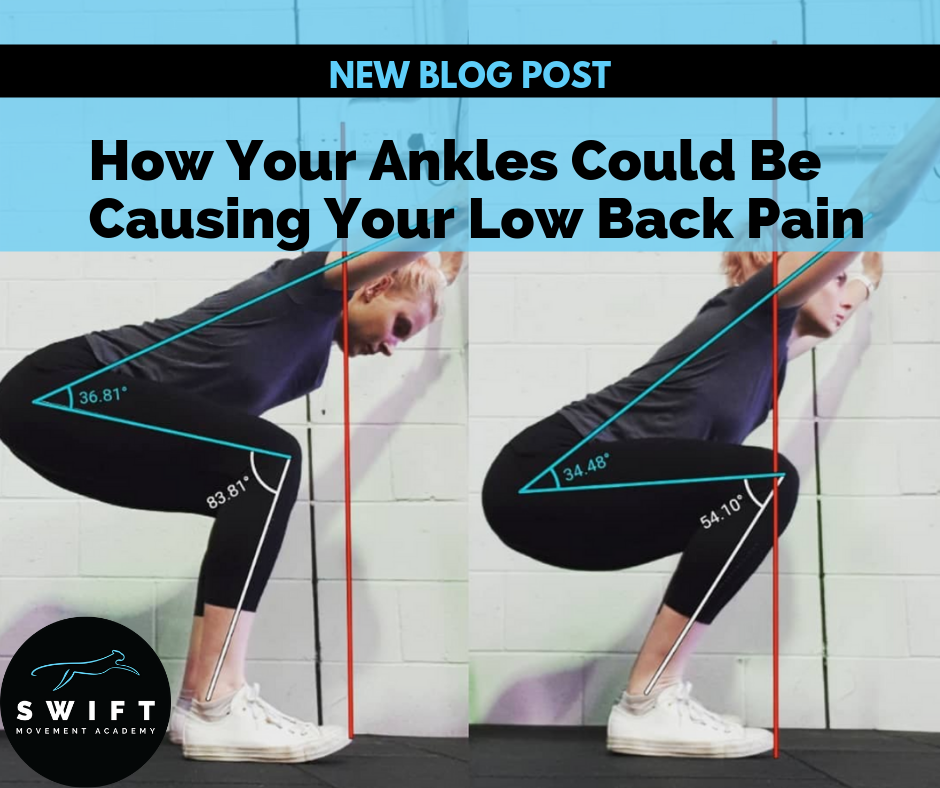
1. Do you find you struggle to hit depth and going deeper just means your chest drops forwards?
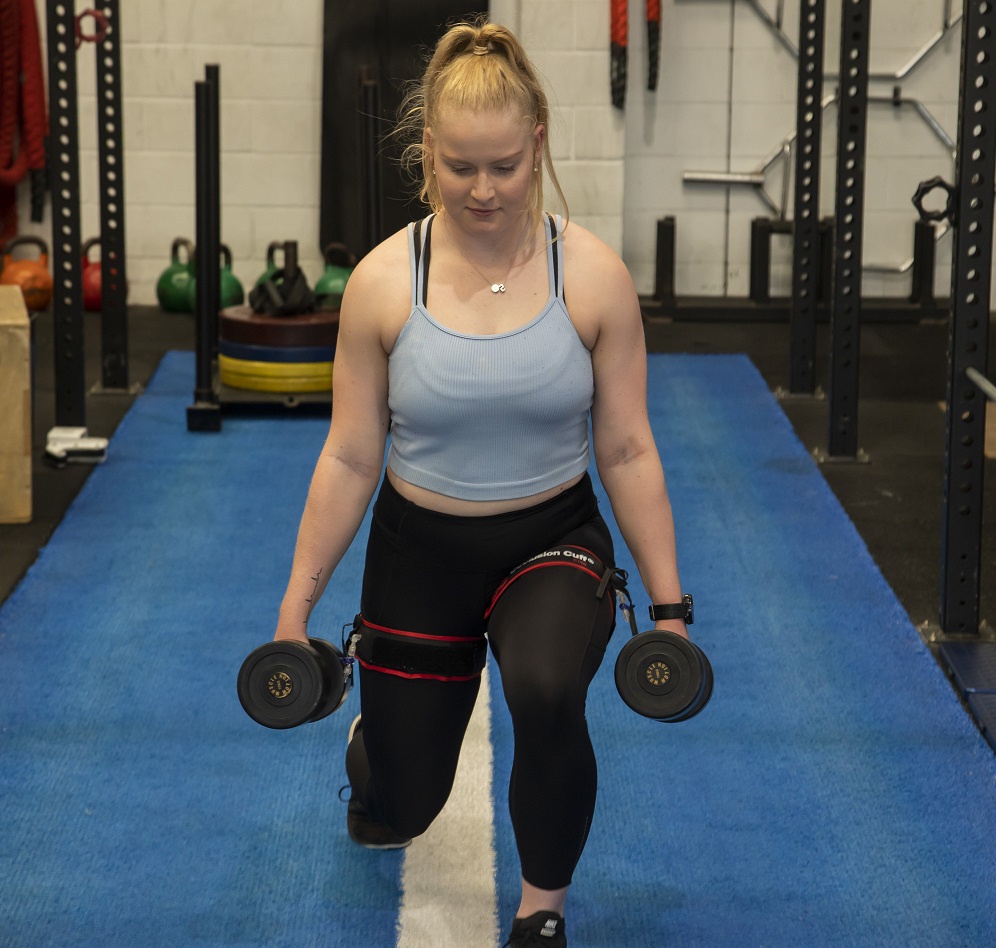
2. Do you notice you struggle to get your knees over your toes in squats and lunges?
3. Does your butt stick out and your squat look like much more of a hinge movement than other people you see squatting?
4. Do you have tight calves?
If you answered YES to any of those, your ankle mobility definitely needs to be assessed! Specifically, your ankle dorsiflexion.
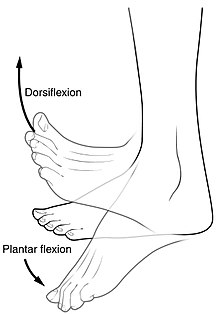
What is Ankle Dorsiflexion?
The range of motion of your ankle to flex (lift) directly upwards, towards your head. When we think about this in terms of weight bearing, dorsiflexion range translates into your ability to force your knee over your toe in movements like squats and lunges and therefore becomes very important.
Without adequate range at the ankle, something else has got to be MORE mobile and work HARDER to compensate. Namely, the lower back. This becomes imperative when it comes to trying to perform things like depth in a squat. When ankle dorsiflexion is limited, squats become significantly more posteriorly loaded and increase the torque at the hip over the knee. When under load, this magnifies and with things like barbell back squats, the force goes through the spine and often the lower back takes the brunt of the load.
How Do I Know What My Ankle Dorsiflexion is?
The Knee to Wall test gives a reliable measure of ankle dorsiflexion and has been scientifically backed in the research as a good indicator of lower limb injury risk.
How to Perform the Knee to Wall Test
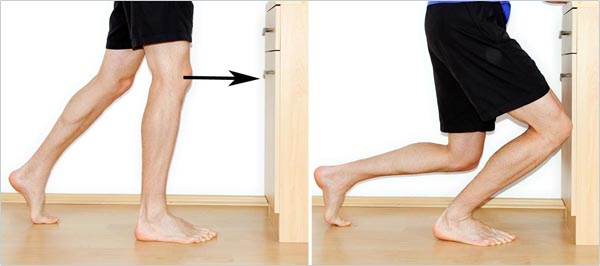
Step 1: Set up a ruler or tape measurer against the wall
Step 2: With shoes off, start with one foot behind the 7cm mark
Step 3: Push your knee directly forward (over your 3rd toe) to attempt to touch the wall while keeping your heel planted.
Step 4: If successful, move back 1cm at a time to find the maximum distance you can achieve with your knee touching the wall. If unsuccessful move forward 1cm at a time until you can touch the wall and record this as your final score.
Step 5: Repeat both sides
NOTE: Make sure your hips don’t rotate or your ankle doesn’t collapse inward when performing this test.
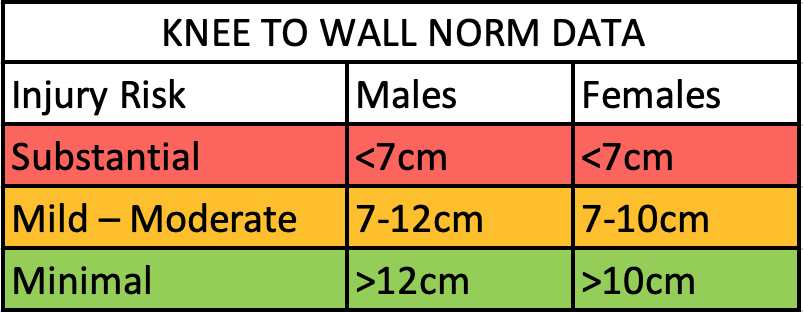
Is My Score Good?
Let’s look at these in more detail…
RED: Significantly restricted and a substantially increased injury risk
You have some serious work to do and your ankle mobility is DEFINITELY affecting your movement capacity. Whether or not you have low back pain (or any other lower limb injury/pain) now or not, your risk of obtaining one is high. You need to sort your ankle mobility out stat! P.S. Scroll down to see how to fix it.
ORANGE: Somewhat restricted with a mild to moderate injury risk
While your ankle dorsiflexion is not a major restriction, there is still a limitation here. Some ankle mobilisation work may help however I’d recommend you still assess other areas to see if there isn’t something else contributing to your back pain.
GREEN: No restriction with normal mobility and minimal injury risk
Look elsewhere! Your ankles aren’t the problem. Hot tip, there is a follow up blog coming out on Thoracic Mobility as your next point of call when it comes to assessing your low back pain… Stay tuned!
Why Did I Score in the Red Zone?
If your ankle mobility sucks, there are 2 very distinct reasons as to why and therefore 2 different methods of improving it. This is important. Using the wrong mobilisation drill to improve your ankle mobility won’t actually improve your dorsiflexion range so pay attention!
You would have felt either a) ankle blocking/jamming in the FRONT of the ankle joint or b) calf tightness.
a) Ankle blocking
When you feel jammed at the front of your ankle joint during the above test, the tibia (shin bone) and talus (top part of your ankle) are to blame. Instead of gliding smoothly over one another, they crash into each other and subsequently block further movement. For this reason, mobilising the front of the ankle joint will provide increased range of motion over time. Adding repeated oscillation-based movements (as I’ll explain below) promote synovial fluid (joint lubrication) in the affected joint which is key to unlocking the blocked ankle range.
b) Calf tightness
Likely you already understand tight muscles need lengthening. That’s common sense. However it’s important to understand that following any soft tissue work (Self-Myofascial Release (SMR), Massage, Physiotherapy, Chiropractic adjustments etc) is it crucial that the muscle is subsequently loaded. Why? Strength training has been proven to be MORE effective when it comes to rewiring the body and the brain’s perception of muscle tightness, as well as teaching and create lasting changes in muscle length (that don’t come with regular unloaded stretching)!
How Can I Improve My Lack of Ankle Mobility?
a) If you had ankle blocking you should do: Ankle Banded Distractions
b) If you had tight calves you should do: Soft Tissue Realise AND Loaded Eccentrics
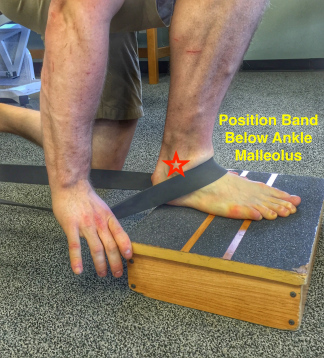
1. Ankle Banded Distractions
Step 1. Take a super heavy powerband or luggage strap (the less give the better), wrap it around the bottom of a pole with a step in front of you.
Step 2. Place your barefoot of the restricted ankle inside the band (as taut as possible) and ensure it is BELOW the malleoli (ankle bones). This is so the talus is unable to move which allows the tibia can glide over it instead of blocking.
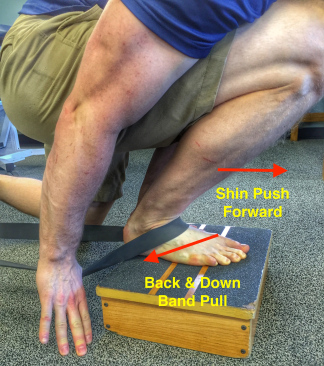
Step 3. Then drive your knee over your toes as much as you can. Hold and perform pulses for 1-2minutes.
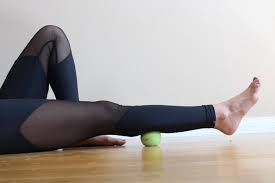
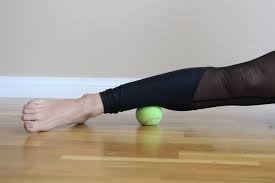
2. Soft Tissue Release
Step 1. Using a foam roller or SWIFT trigger ball place the affected calf on top of the device with your unaffected leg on top of the other leg.
Step 2. Play around by moving your body about the roller/trigger ball both up and down and by rotating your leg (thinking 10 O’clock – 2 O’clock usually works relatively well). Take it slowly and hold on any spot that feels tight or uncomfortable.
Step 3. Hold and perform for a total of 1-2minutes each side.
3. Loaded Eccentrics
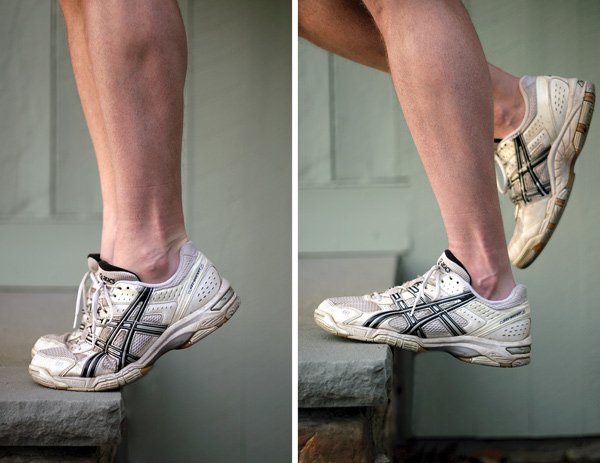
Step 1. Start on a step standing on one leg and holding a nearby railing/wall.
Step 2. Perform a calf raise with a negative (eccentric) movement also. This requires you to lift and lower as high and low as you can respectively each rep.
Step 3. Start with 2 sets of max reps each leg. I recommend starting with bodyweight. The idea is to aim for 20reps each side, but most people, and especially those with limited ankle mobility will struggle with this initially.
Note: Ankle mobility is a b*tch. It takes time, patience and consistency to improve so don’t expect instant improvements in range. What you will feel instantly after just 1 mobility exercise is more freedom in the ankle itself and it’ll make squatting and other lower body exercises feel a heck of a lot better. I strongly recommend performing your specific ankle mobility drill BEFORE EVERY TRAINING SESSION and keep at it. It’ll improve your lifts over time and is a non-negotiable pre-lifting with all of my lifters who have restricted ankle mobility.
Why start 10m behind the starting line and keep yourself at a disadvantage when you now have the tools at your fingertips to improve it? No one trains to be the same, so stop lifting weights like it and put in the work to reap the rewards! Your future self will thank you for it.
—-
Lastly, before you go I have a favour to ask…
If you’ve read this far, hopefully it’s because you found the content worthwhile. Maybe you know someone else who would benefit from it too? I would love if you would share this with your friends, colleagues or family and share the knowledge so more people can become educated, rehabilitated and empowered through movement.
x
Zenia – Managing Director @ Swift Movement Academy